Some days, we know lunch is going to be very late (order processing days are infamously so) so we'll try to grab a little something in the morning to tide us over. Maybe a piece of fruit or a muffin, but our go-to breakfast of choice is a toasted bagel with freshly made goat cheese, just out of the draining bags.
For the longest time we struggled with finding a good source for bagels. We're 100 miles form the nearest bagel bakery (not that Arizona is exactly well known for the quality of it's bagels to start with!) and the grocery store bagels we'd tried were insipid imitations at best. "Bagel-shaped bread" Kathryn called it.
There is one little bagel shop in Tucson we'd discovered when we lived there that could make a really good bagel (depending on who was baking that morning). In the years since we moved to The Ranch I'd make it a point whenever I was in town to pick up a couple of dozen to carefully bag and freeze upon getting home. We'd dole out those bagels like they were solid gold.
As our time up here went on, I found my need for trips to Tucson getting fewer and farther between. What had, at one point, been trips down about every other month became 2 or 3 times a year. Now I get down there maybe once a year. We needed a new bagel source.
The obvious solution was to make them ourselves. I'd been baking for 35 years but, for some reason, had never attempted bagels. I guess they seemed too complicated and specialized to be able to do a good job of on a small-scale/home basis. I knew there were several cooking steps and had read a couple of recipes that called for things like "Non-diastatic Malt Powder", whatever that was.
Whatever my phobia/excuse/aversion, it was time to "man-up" and learn to make bagels. I read everything I could find about the process and while there were plenty of "easy", or "one-step" types of recipes out there, the more I looked into it, the more I became convinced that there were no good short cuts, cutting corners or substitutions that didn't, in some way, act to the detriment of the final product.
If I was going to do this I was going to do it right so I took several well respected and authentic formulas (some for practically industrial quantities) and made a melange of their similarities and differences and came up with a solid, scaled-to-home-use base, from which to start. I also ordered some of that mysterious Non-diastatic Malt Powder online. By the time it arrived, I was ready to give it a shot.
Let's just say the first batch was a "learning experience". It's not that they were inedible, or anything, but they needed a lot of help. For one thing, I didn't realize how much they would grow through the boiling and baking processes. Called "oven spring", the rapid expansion of the dough when it meets high heat is a combination of the yeast's gas-producing effect briefly increasing and the expansion of the dough as some of it's moisture turns to steam. Anyway, I didn't account enough of it and my first bagels ended up without any holes at all and were more like large rolls. On the up-side, the flavor was excellent, the texture was dense and chewy and the crust was shiny and crisp. In short, a pretty good bagel (if you didn't look at it).
A couple of tweaks to the recipe and some re-thinking about how I was forming the dough and I was ready for another shot. They came out MUCH improved in form and just as good otherwise. I made some notes for a few small changes.
Subsequent batches went easier and easier. I optimized my set-up so it took less space, time and clean-up. I converted the mish-mash volume/weight/measure/English/metric ingredient list to primarily metric weight to ensure best possible future repeatability (something I've been working towards on most of my recipes for years).
Anyway, this morning I made bagels. "Everything bagels" are our favorites and so that's the type I made this time. The process was smooth and fluid and while, sure, bagels have a few more steps than a loaf of white bread, it's hard to remember what all the drama was about in finally making my first ones.
Here's my recipe and some process pictures...
BMR "Everything" Bagels
Yield: 12 Bagels
Ingredients
12 Grams Dry Yeast
70 Grams Non-diastatic Malt Powder
24 Grams Sugar
1 pint Warm Water
720 Grams Bread Flour
16 Grams Salt
As Needed (about 300 grams total) Topping: Your choice combination of: Sea Salt, Poppy Seeds, Sesame Seeds, Onion, Garlic, Caraway, Etc.
For Water Bath
3 Quarts Water
50 Grams Non-diastatic Malt Powder
24 Grams Sugar
Method
1. Combine the yeast, malt and sugar in a mixer bowl
2. Add the warm water, mix, and let the yeast proof for a few minutes.
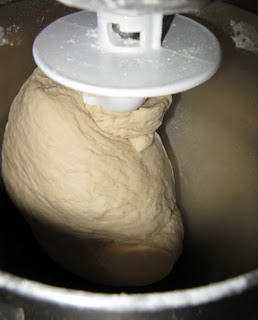
3. Add the flour and the salt then knead the dough till smooth.
4. Shape the dough into a ball place it in a lightly greased bowl covered with lightly greased plastic wrap, and allow it to rise till doubled in bulk, 1 to 1-1/2 hours.
5. When the dough has risen, release the air and transfer it to a clean work surface.
6. Put the water into a 4-5" deep pot about 10" in diameter -- the water should be about 3 inches deep -- and add the malt and sugar. Bring the water mix to a boil while shaping the bagels.
7. Scale the dough at about 3.5 oz (100 grams, .22 lb) which should make about 12 pieces. Roll the prices into balls.
8. Working with one piece of dough at a time, shape it into a ball, poke a hole through the center with your index finger, and twirl; the dough will form a ring.
9. As you get 3 or 4 bagels ready, boil them immediately for chewiest bagels, or let them rise a bit (see notes). Keep the water bath at a simmer. Don't crowd the bagels in the water. Simmer them for about 30 seconds on each side, then drain briefly.
10. While still hot and moist, dip the bagels top and bottoms, in topping mix, then move them to a parchment-lined sheetpan, liberally sprinkled with corn meal.
11. Bake the bagels in a preheated 425°F oven for about 20 minutes, or until they are a deep golden brown.
Second rise or not?
Boiling the bagels immediately after shaping will produce chewy, dense bagels. Letting the bagels rest and rise for 30 minutes or so after shaping, will yield a lighter, puffier bagel. Be advised that rising the bagels before boiling will make them more fragile and more difficult to handle (they will want to deflate in the water bath).
What's with the "Non-diastatic Malt Powder"?
Malt Powder improves the flavor of the bagels and, more importantly, when used in the water bath it gives them a shiny crust. Non-diastatic malt powder is made from sprouted barley kernels which have been roasted (to intensify their natural sweetness), ground, filtered in water (to remove husks and bran), then dehydrated. The resulting powder, has a characteristic sweet caramel taste and aroma. Regular (diastatic) malt retains enzymes which gives yeast a boost - a desirable characteristic in some applications, but not for bagels. Non-Diastatic Malt is much more stable here. Too much Diastatic Malt might cause the bagels to collapse or even start breaking a part in the simmering water.


No comments:
Post a Comment